How To Install Apache Kafka on Ubuntu 20.04
Apache Kafka is an open-source distributed event streaming platform used by thousands of companies for high-performance data pipelines, streaming analytics, data integration, and mission-critical applications.
In this tutorial, we will show you how to install kafka on Ubuntu 20.04.
Step 1: Install Java
Apache Kafka is created in Java so we need to install it to be able to use it. To do this, run this command
sudo apt-get update


sudo apt install default-jdk
Verify the installation, by typing
java -versionStep 2: Download Apache Kafka
Download Apache Kafka through any web browser or use the below provided link: https://kafka.apache.org/downloads.
Here we will be using the wget command we can download the Kafka package, and we will be working in "/opt/" folder
cd /opt/


wget https://dlcdn.apache.org/kafka/3.1.0/kafka_2.13-3.1.0.tgz


tar -xvzf kafka_2.13-3.1.0.tgz


ln -s kafka_2.13-3.1.0/ kafka
Step 3: Setting the Path
We are going to set the path locally so as we can access Kafka from any location (by default we access it from the installation folder we unzipped)
navigate to the home ,
cd ~and open " .bashrc " file,
nano .bashrcat the end, set the path where we installed kafka, for our example we installed at " /opt/kaka/bin "
export PATH=/opt/kafka/bin:$PATH

Save the file ( Ctrl + O )and exit ( Ctrl + X )
Reload the configuration
source ~/.bashrc
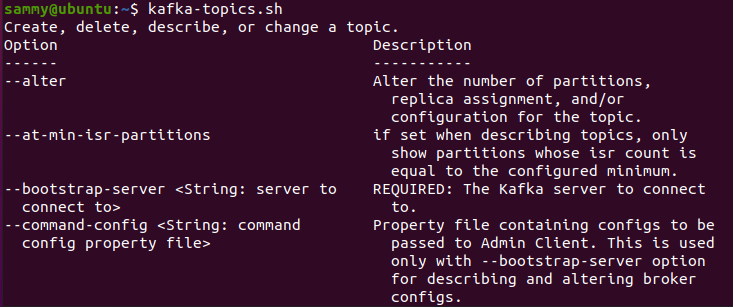
Verify the configuration by typing
kafka-topics.sh 
Step 4: Creating data directories for zookeeper and kafka
Apache Kafka depends on Zookeeper for cluster management. Hence, prior to starting Kafka, Zookeeper has to be started. There is no need to explicitly install Zookeeper, as it comes included with Apache Kafka, move to the kafka installation directory and create a folder named "data"
and move inside the data folder and create two new folders named as 'zookeeper' and 'kafka'
cd /opt/kafka/


mkdir data


cd data


mkdir zookeeper


mkdir kafka
Step 5: Configure zookeeper properties
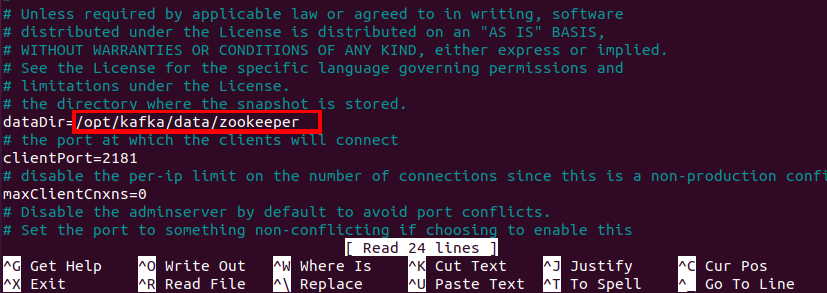
Open the zookeeper.properties file, located under config folder, and update the value of dataDir,
change from "/tmp/zookeeper" to "/opt/kafka/data/zookeeper"
cd /opt/kafka/


nano config/zookeeper.properties

Step 6: Start zookeeper
Now, start the zookeeper server with the help of the below command:
zookeeper-server-start.sh config/zookeeper.properties

Step 6: Configure kafka-server
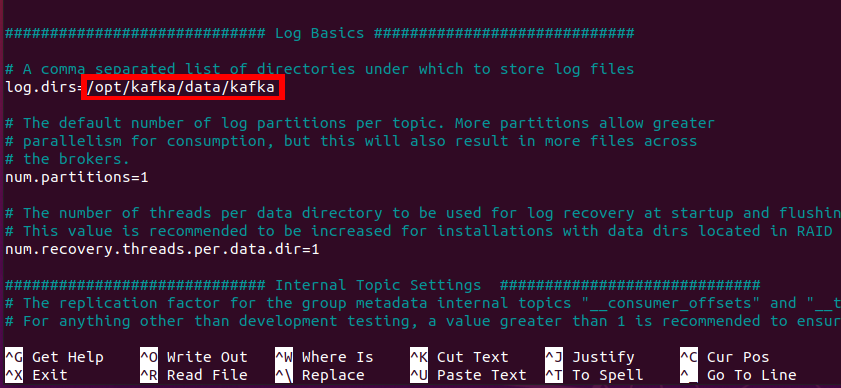
Open the server.properties file, located under config folder, and update the value of log.dirs,
change from "/tmp/kafka-logs" to "/opt/kafka/data/kafka"
nano config/server.properties
Step 6: Start kafka-server
Now, start the kafka server with the help of the below command:
kafka-server-start.sh config/server.properties

Also, move to the kafka folder and use 'ls' command. It will display all new automatic created files that will tell the successful startup of the Kafka server.

Step 4 - Stop the Server
After performing all the operations, you can stop the server using the following command −
bin/kafka-server-stop.sh config/server.properties
Step 6: Stop zookeeper
To stop the zookeeper server type the following command:
zookeeper-server-stop.sh config/zookeeper.properties
Step 4 - Automatically Start Kafka on Server boot
Here we will configure Kafka daemon with System.d. and then enable them to be autostarted when server starts
Step 4.1 Create zookeeper service
create a file kafka-zookeeper.service and place it in the following folder "/etc/systemd/system/"
sudo vi /etc/systemd/system/zookeeper.service
[Unit]
Description=Apache Zookeeper server (Kafka)
Requires=network.target remote-fs.target
After=network.target remote-fs.target
[Service]
Type=simple
User=root
ExecStart=/opt/kafka/bin/zookeeper-server-start.sh opt/kafka/config/zookeeper.properties
ExecStop=/opt/kafka/bin/zookeeper-server-stop.sh
Restart=on-abnormal
[Install]
WantedBy=multi-user.target
Start Zookeeper
sudo systemctl enable zookeeper.service


sudo systemctl start zookeeper.service


sudo systemctl status zookeeper.service
Step 4.1 Create kafka service
sudo vi /etc/systemd/system/kafka.service
Description=Apache Kafka server (broker)
Documentation=http://kafka.apache.org/documentation.html
Requires=zookeeper.service network.target remote-fs.target
After=zookeeper.service network.target remote-fs.target
[Service]
Type=simple
User=root
ExecStart=/bin/sh -c '/opt/kafka/bin/kafka-server-start.sh /opt/kafka/config/server.properties > /opt/kafka/kafka.log 2>&1'
ExecStop=/opt/kafka/bin/kafka-server-stop.sh
Restart=on-abnormal
[Install]
WantedBy=multi-user.target
Start kafka
sudo systemctl enable kafka.service


sudo systemctl start kafka.service


sudo systemctl status kafka.service
Test Kafka works
create topic
kafka-topics.sh --create --topic test-topic --bootstrap-server localhost:9092 --replication-factor 1 --partitions 1
kafka-topics.sh --describe --bootstrap-server localhost:9092 --topic test-topicput messages to topic
kafka-console-producer.sh --broker-list localhost:9092 --topic test-topic> test message1
> test messate2
^C
read messages from topic
kafka-console-consumer.sh --bootstrap-server localhost:9092 --from-beginning --topic test-topic

test message1

test messate2

^C


